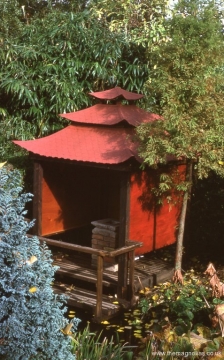
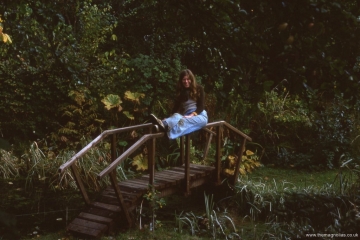
The End of the Road for Our Old Pagoda

We built our original oriental style pagoda during the summer of 1976.

It had a few improvements, changes and repairs over the years, but by five years or so ago, it was no longer safe to cross over the walkway in the front of the pagoda.

At last spring’s Epimedium Open Weekend we discussed its demolition and replacement with several groups of visitors. To our surprise quite a few people said this would be a shame as it had a lovely “lost Garden of Heligan” look. However it was beginning to lean perilously to the point it was clear it would fall into the pond before too long.

We were still buoyed by the success of our previous year’s project of bridge building, so decided to bite the bullet and start our 2017 project of a replacement oriental style pagoda. We could see that this was going to be a significantly more daunting job not least because the pond hadn’t been de-silted for perhaps twenty years or more.

Around the 14th May we pumped out the limited amount of water remaining in the pond, and made a start of digging out the silt.Fortunately our son Paul was able to help carry the filled buckets from the pond, to be tipped in one ton builders bags held up with steel road pins. Our fears of there being quite a lot proved correct. We filled six bags and further, more solid material was tipped on the garden in places, to break down later. The silt removal was mostly completed in various sessions over about three days.

Before proceeding with demolition of the old pagoda itself we decided to repair the York-stone crazy paving at the far end of the pond. A pointed piece of a square yard or so had drooped over the years so the tip of it was under water. We had approached our ‘friendly builders’ about the problem but they couldn’t see my plan for jacking up the whole piece, possible. Paul and I tackled it one weekend when Linda was away at her mum’s. We used the Metasequoia glyptostroboides (Dawn Redwood) trunk and an aluminium ladder as a crane with ropes and a hand winch to pull the paving up by some six inches. I had remembered that this piece of paving had been reinforced with stainless steel rods, so was reasonably confident it would not break up. It was remarkably successful and with a little trepidation we concreted in a cut down concrete post, in under it, to keep it level with the nearest stepping stone as it had been originally. A few other areas of paving lifted by the Metasequoia’s roots also needed work. Also that weekend, Paul and I concreted in a new third stepping stone, which we thought a good idea as there was rather a big gap between the bank and one of the original ones.

By the 6th June we were ready to do the demolition. As most of the construction was lightweight it wasn’t too big a job. For some while we had had it propped up with a post in case it toppled on to us while we did work in the pond, so minimum work with a chain saw had it rolling into the pond. We decided to burn the roof which was only hardboard covered in fish scale tiles cut out of roofing felt, in an incinerator. I cut it up with a large battery reciprocating saw into burnable sized pieces. All went well until we went a little way away for elevenses’, when the heat caught the rest of it on fire, so the job was speeded up somewhat and a bit of vegetation scorched.

The old plywood sides were cut out of the buildings timber work for possible use later. The burnable timber was given to a neighbour to feed his wood burner.

The perilously leaning Buddha plinth was deemed not to be recoverable so was broken up, hoping the old handmade bricks might be useable for something someday.

Stay tuned for part two where construction begins!

Failed Experiment!

About a year ago we were given a small aluminium greenhouse by new neighbours who preferred it to go for safety reasons, having young children and because of future house extension plans.

. We took it down, transported it to our garden and shoe-horned it into our newest piece of land. We planted it out with slightly more tender plants including our orange and lemon trees, begonias and Nerines.


However the biggest part of the experiment was to plant our potted Dahlia imperialis var. album in the ground, with a view of removing panes of glass when it grew too tall.


This was in the hopes it might flower a little earlier and escape the first hard frosts of winter which previously destroyed the display shortly before flowering. It had flowered once successfully when younger, when it wasn’t too tall for our highest greenhouse.


It grew rapidly in the spring, and the glass needed removing by the third week in May. It had been joined by the commoner pink form, bought at the Plant Heritage spring plant fair at Hyde Hall. I told the seller of our greenhouse idea, and he warned me it was likely to fail as the plant responds to day length and short of covering it with blackout material it would flower at the same time as without the greenhouse.

I suspected that he was correct but we went ahead with the experiment anyway.

The original white flowered plant grew four stems, whilst the new one grew one. All grew large producing dense canopies of leaves, to the detriment of all the other inhabitants of the greenhouse.

I constantly raised the canopy of Dahlia leaves to reduce the shading to help the other plants. In the autumn a storm snapped off the three smaller stems of the white flowered form and the single stem of the pink.


The remaining large stem produced a number of long side branches with many flower buds at the ends


.

The effect is certainly tree like making the common name of “Tree Dahlia” quite apt, more so than the name “Tree Lilies” for the very tall lilies sold under this name currently.


The buds were on the verge of opening when the current cold snap came. The result is total destruction of all foliage and flower buds. I have therefore cut it down to the ground and replaced the two panes of glass that had been removed in May.

Houdini Badger

Last night, a badger managed to bend the vertical strands of the ‘badger proof’ fencing to create a hole 13.5cm by 19cm. This is smaller than a normal cat flap! The picture below shows one vertical wire only bent to the left, the other one being bent similarly to the right. In fairness to the fencing, it had to push itself through against the hedge. Without this to push against it wouldn’t have been able to make its way through.

The second video clip below is presumabably another fatter badger that failed to push through the same hole and then decided to climb back down..

Video clip below; Yesterday we blocked the hole with finer mesh and this is what occurred. The clip is probably good enough for You’ve Been Framed!

Badger Acrobatics

Recently we have been trying to help our neighbour, Dave K. identify where badgers are getting into his garden, before ripping up his lawn. We have had our ‘Outback Cam’ in his garden for night after night, and still have not identified their point/s of entry. It is beginning to look as though they patrol his garden on most nights. However it is only now and again that the lawn is devastated. One of his other neighbours put up special’ badger proof’ fencing against a short length of Dave’s boundary. The You Tube videos here show a badger scaling the fencing, and then walking along the top of the trellis on our shared fence line, then probably dropping into our garden.

Epimedium Weekend 6th and 7th May 2017 From 10.00am to 4.00pm

We are having a Garden Open Weekend in order that interested gardeners can come and enjoy our National Collection of Epimediums.

Of course there will be many other plants to see including trees, shrubs and bamboos.

Unfortunately we do not have the space for raising many Epimedium plants for sale ourselves, but Dave Sisley of Straight Mile Nursery ( www.straightmilenursery.co.uk ) will be here with Epimediums for sale on both days. Over the last few years he has increased his range in stock to include some less common varieties.

Our address is;-

The Magnolias, 18 St John’s Avenue, Brentwood, Essex, CM14 5DF.

We look forward to meeting some of our website followers.

Magnolia Stump Removal

Today we have removed the root bowl of the Magnolia. We used a technique we have used on other fair sized tree stumps in the past.

This involves leaving around four foot of trunk on the root bowl, and sawing it in half lengthwise as low as possible. Then using wooden wedges and logs driven in with a sledge hammer the root bowl is split in two.

We did this today without digging out the bowl by sawing the exposed half again lengthwise and splitting this in half again. We pulled each quarter away from the rest with a small hand winch.

The remaining half still attached to the ground was again sawn and split with wedges. The remaining quarters were winched out after a few roots were cut through with a root axe.

Devastating Doris

We went down the garden just before lunch today, to find a much loved old ‘Tree Magnolia’ horizontal, a victim of yesterday’s ‘Storm Doris’.

This larger growing form of the ‘Willow Leaved Magnolia, Magnolia salicifolia var.  arborea, was planted over forty years ago and was purchased from The Seville Garden.  It had reached approximately thirty five feet in height and was carrying hundreds of flower buds.

Although there were no outward signs of ill health, the root-ball was not as good as the top of the tree would have indicated. It fell into a neighbour’s garden and flattened a 6ft high chain link fence breaking two of its straining wires and bending a post. Fortunately there was a only a small amount of collateral damage in our garden in the form of half of a four foot high Japanese Maple being smashed off. If the wind had been Northerly it could have fallen on our Mandarin Arbour, but wouldn’t have reached our new bridge.

With our son Paul and another neighbour, Dave’s help, Linda and I managed to clear next door’s garden, shred the smaller branches and cut up the trunk into splitable lengths.

The storm also blew a bird feeder out of a shrub just outside our kitchen window, spilling the seed on the path. A field mouse is pictured below, taking advantage of the sudden windfall, in broad daylight (2.00pm).

Aquarium Re-think

As in previous winters our gardening activities have been hampered by inclement weather, so work has been done to aquariums instead. They tend to get rather neglected in the other seasons of the year.

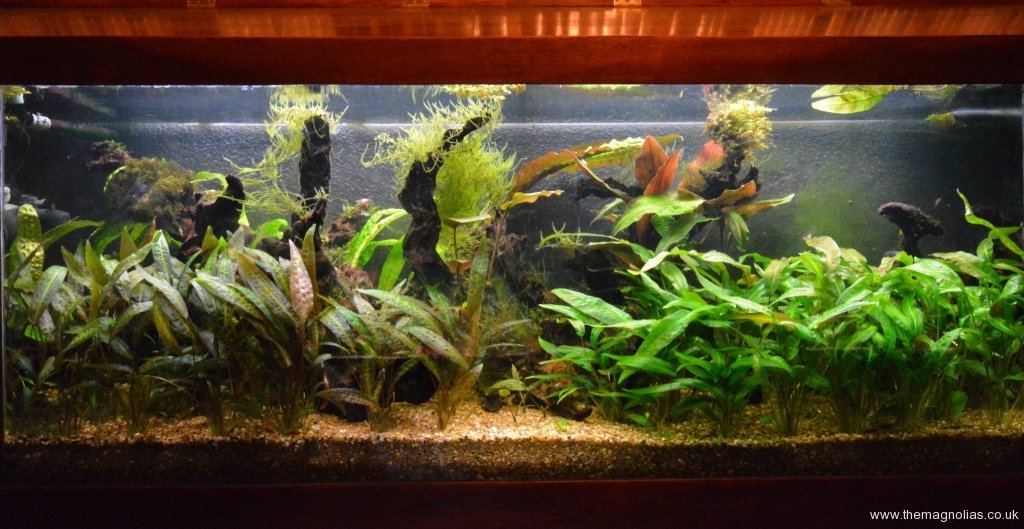
We decided to redo our most recently set up aquarium, which we had tried as a soft-water tank. This had been an almost complete failure as we had hoped to grow soft-water Cryptocoryne species and Crystal Red Shrimps. Probably, due to lack of water changes the shrimps never bred, and in the end the Crypts faded away. We were left with a few Pygmy Rasboras and small Tetras and a collection of mosses. The substrate we used was a man-made Japanese material believed to be made from paddy field clay and the tank had been filled with rain water from our shed roof. The original bog-wood features were reused and many of the attached mosses have re-grown well.

We stripped out everything and put an inch (2.5cm) of garden soil in the bottom followed by about three inches (7.5cm) of normal aquarium gravel. We then filled with Essex tap water.

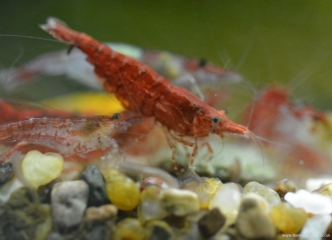
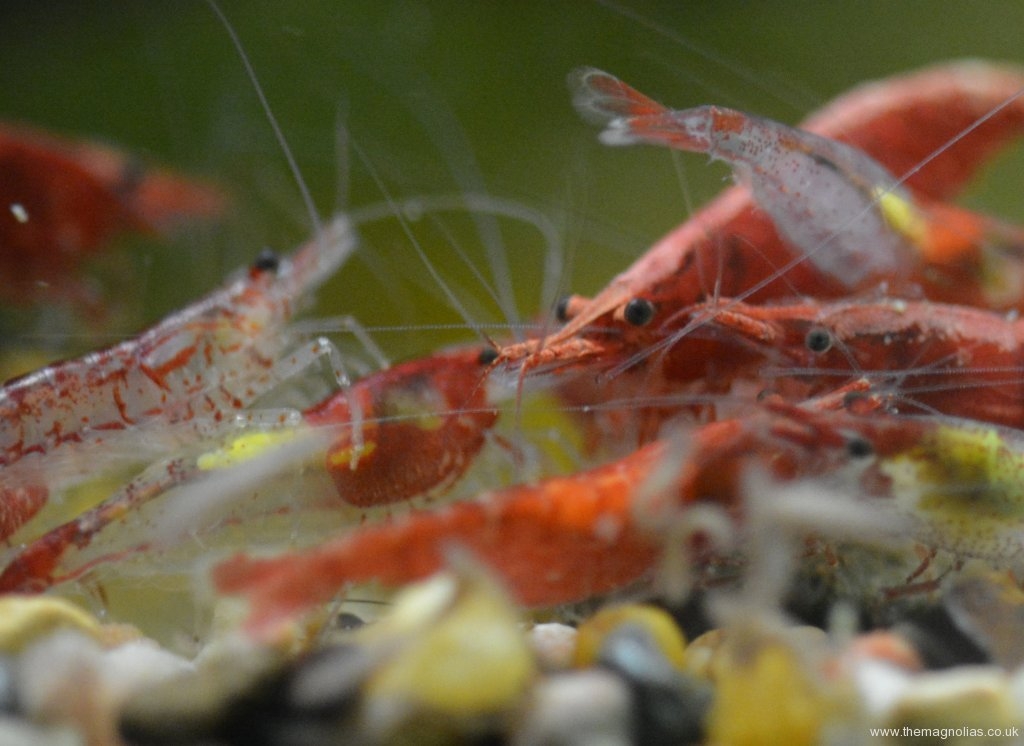
Our good friend James had decided to close his tropical fish shop, Wayside Aquatics, after thirty years and to reduce the number of his own aquariums. He very generously donated several unusual Cryptocoryne species which are ok in hard-water. These were two clones of C. affinis plus hudoroi, cordata, usteriana ‘Red’ and pontederiifolia. A couple of weeks after planting up the aquarium he also gave us a good number of Neocaridina heteropoda shrimps in red, yellow, orange, blue and ‘Rili’ which have red at each end and clear in the middles. Mixing the varieties is undoing all the good work of selective breeding and the results of interbreeding may be a disaster, but we will see. I have recently counted over a hundred babies from about 1mm to 4mm long. We are only going to have Ottocinclus cat fish in this tank, as they are said to be baby shrimp safe.


New Oriental Style Bridge

In early summer 2015 we decided to de-silt our ‘bridge pond’ with a view to replacing the bridge, which was about forty years old. It had been built from second hand house timbers, bought from a demolition yard, and probably derived from buildings created before the advent of timber treatment. On completion we had treated it with brown Cuprinol. Over ten years ago, we did some repairs with some woodwork being replaced, and it was again painted with a wood preservative. By 2015 it was in a poor state and clearly needed major repairs or replacement.

We had hoped to build a new bridge in 2015 or even buy a proprietary one, but I was suffering from bad sciatica, no doubt exacerbated by the silt removal job, where Linda and I removed three and a half ton builder’s bags of heavy muddy material.

Towards the end of August this year, we decided to build a new bridge, with the encouragement and enthusiastic help of our son, Paul.

It took very little time to demolish the old bridge as it was quite rotten.  If I had known how bad it was I wouldn’t have continued walking over it until the last moment.

Over the years I have photographed a number of oriental style bridges in gardens open to the public, including Abbotsbury Sub-tropical Gardens, Forde Abbey Gardens and Compton Acres. Using these pictures and online images from searching ‘oriental garden bridges’, I drew a fairly rough, A4 plan of what I thought might achieve an attractive result. We were to utilise the four iron bed-frame fixings from the old bridge and had decided on an arch bridge despite the difficulty in creating a pair of twelve foot long arches. I reckoned six inch by an inch and a half thick would be adequately strong and could be created from three pieces per arch. These could be cut from three 3 metre scaffold boards. In the end we went for slightly thicker and more expensive, treated timber in 3.6 metre lengths.

Our first job in creating the arches was to make a three piece template from scrap hardboard and battens, to be copied onto the timber. Using a peg, a piece of string and a pencil, a 13ft radius arc was drawn onto the hardboard.

I had devised a joint that I thought would be self locking under strain and therefore strong. Having originally thought the arches might be cut out with a jig saw, a trial showed this would not work, as the blade rapidly curves to attempt to follow the grain. We decided a band-saw was the only way, so we bought a cheap one from Homebase. I tried this on the timber and initially decided it wasn’t up to the task. However, with a great deal of patience, Paul cut out the six pieces taking him almost as many hours.

The joints were glued and screwed with two stainless steel screws from above and two from below.

The arches were duly bolted to the fixings with various spacers to make them parallel and vertical.

The deck was to be of 2×2” timber, and Paul suggested it would be good to cut slots in each, to let them sit over the arches.

He hadn’t quite realised the work involved, but set about routing them in batches of twelve, following a pattern one. Linda set up two pieces of batten between two stepladders and painted the completed pieces of decking as they were prepared. There were ten longer ones to support the handrail uprights. These had pieces cut out at the ends at various angles to allow the handrail uprights to be vertical. Paul made these cuts using a Japanese hand saw which cuts on the pull stroke. I cut multi-angle blocks of wood to support the bottom ends of the handrail uprights, using a sliding, compound, mitre saw, and was pleased with the results. The end ones had to be further shaped to clear the concrete on the pond banks.

After all the footway and hand rail uprights were glued and screwed in place we tackled the handrails themselves. We obtained a dozen 13ft long; knot free pieces of meranti wood 3” wide by ¼” thick. We marked the handrail uprights at an agreed height and the various angles using the hardboard arch template and cut off the excess with the Japanese saw. The first strip of meranti wood was fixed with glue and temporary screws to the uprights. The free ends were pulled down to follow the curve by screwing a block of wood underneath and putting a loop of 80lb fishing line between it and the deck. A foot long length of bamboo was inserted into the loop and then continually twisted to tighten the line, until the curve was judged by eye, to be correct.

When the glue had set, the screws were removed and a second strip of meranti was glued in place and clamped to the first with all the quick clamps and G clamps we possess.

However it became obvious that these weren’t enough. In the end I quickly made 22 clamps for each side, each consisting of two six inch long pieces of wood and two screws, which were changed for longer ones as the layers were added. In the end we decided five layers were adequate and very strong, and six might have looked too heavy.  When it was dry I used an electric planer to even up the sides followed by a router to round off the corners followed by sanding..

Since completing the construction work, we have been applying coat after coat of ‘Protek’ dark oak and fire engine red wood stain, to hopefully make the bridge last for many years.

We are keeping the pond empty until after the autumn’s leaves have fallen, before allowing it to fill up again naturally.

Two New Projects for our Friendly Builders

As my lower back problems continue, we again employed our builder friends to do a couple of hard landscaping projects in the garden. The major job was the construction of a concrete block wall to be a raised bed in the fairly utilitarian are of the ‘new garden’. This bed was for a number of purposes.

It has been built in front of a bank with a boundary hedge growing in it where our neighbours, Ollie and Monica’s garden is some two foot higher than ours. Historically badgers and possibly foxes have on several occasions tried to set up home under our neighbours’ garden. This happened even before we bought the piece of garden from our next door neighbour, Dave, some ten years ago ( in total we share a boundary with eight different properties). Both Dave and us have filled in holes on numerous occasions, and tried to prevent further excavations by leaning paving slabs, and pallets etc against the bank. The new bed has hugely tidied up this part of our boundary. In addition it has been a place for the builders to dispose of the partially dried silt that Linda and I cleared from the pond last summer and soil they excavated carrying out their paving works. Finally on completion the raised bed has become a home for around thirty of our own seedling Epimediums, which can grow on for further assessment.

Their other tasks were to extend the York-stone paved area by the ‘bridge pond’ and to create a bamboo barrier with cut paving slabs.

There ia a short growing Pleioblastus species growing on the pond bank which stabilises the pond edge. The slab edging has created a narrow bed for Epimediums between the bamboo and the newly extended paved area. The enlarged paved area is now large enough for us to use it as an area for shredding woody prunings and weeds etc. The area was used for this purpose before the area was paved, but it often became very muddy especially in winter.