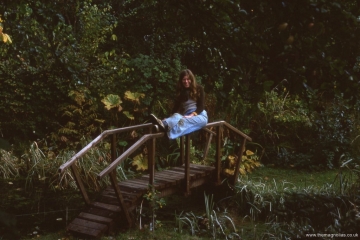
In early summer 2015 we decided to de-silt our ‘bridge pond’ with a view to replacing the bridge, which was about forty years old. It had been built from second hand house timbers, bought from a demolition yard, and probably derived from buildings created before the advent of timber treatment. On completion we had treated it with brown Cuprinol. Over ten years ago, we did some repairs with some woodwork being replaced, and it was again painted with a wood preservative. By 2015 it was in a poor state and clearly needed major repairs or replacement.
We had hoped to build a new bridge in 2015 or even buy a proprietary one, but I was suffering from bad sciatica, no doubt exacerbated by the silt removal job, where Linda and I removed three and a half ton builder’s bags of heavy muddy material.
Towards the end of August this year, we decided to build a new bridge, with the encouragement and enthusiastic help of our son, Paul.
It took very little time to demolish the old bridge as it was quite rotten. If I had known how bad it was I wouldn’t have continued walking over it until the last moment.
Over the years I have photographed a number of oriental style bridges in gardens open to the public, including Abbotsbury Sub-tropical Gardens, Forde Abbey Gardens and Compton Acres. Using these pictures and online images from searching ‘oriental garden bridges’, I drew a fairly rough, A4 plan of what I thought might achieve an attractive result. We were to utilise the four iron bed-frame fixings from the old bridge and had decided on an arch bridge despite the difficulty in creating a pair of twelve foot long arches. I reckoned six inch by an inch and a half thick would be adequately strong and could be created from three pieces per arch. These could be cut from three 3 metre scaffold boards. In the end we went for slightly thicker and more expensive, treated timber in 3.6 metre lengths.
Our first job in creating the arches was to make a three piece template from scrap hardboard and battens, to be copied onto the timber. Using a peg, a piece of string and a pencil, a 13ft radius arc was drawn onto the hardboard.
I had devised a joint that I thought would be self locking under strain and therefore strong. Having originally thought the arches might be cut out with a jig saw, a trial showed this would not work, as the blade rapidly curves to attempt to follow the grain. We decided a band-saw was the only way, so we bought a cheap one from Homebase. I tried this on the timber and initially decided it wasn’t up to the task. However, with a great deal of patience, Paul cut out the six pieces taking him almost as many hours.The joints were glued and screwed with two stainless steel screws from above and two from below.
The arches were duly bolted to the fixings with various spacers to make them parallel and vertical.
The deck was to be of 2×2” timber, and Paul suggested it would be good to cut slots in each, to let them sit over the arches.
He hadn’t quite realised the work involved, but set about routing them in batches of twelve, following a pattern one. Linda set up two pieces of batten between two stepladders and painted the completed pieces of decking as they were prepared. There were ten longer ones to support the handrail uprights. These had pieces cut out at the ends at various angles to allow the handrail uprights to be vertical. Paul made these cuts using a Japanese hand saw which cuts on the pull stroke. I cut multi-angle blocks of wood to support the bottom ends of the handrail uprights, using a sliding, compound, mitre saw, and was pleased with the results. The end ones had to be further shaped to clear the concrete on the pond banks.After all the footway and hand rail uprights were glued and screwed in place we tackled the handrails themselves. We obtained a dozen 13ft long; knot free pieces of meranti wood 3” wide by ¼” thick. We marked the handrail uprights at an agreed height and the various angles using the hardboard arch template and cut off the excess with the Japanese saw. The first strip of meranti wood was fixed with glue and temporary screws to the uprights. The free ends were pulled down to follow the curve by screwing a block of wood underneath and putting a loop of 80lb fishing line between it and the deck. A foot long length of bamboo was inserted into the loop and then continually twisted to tighten the line, until the curve was judged by eye, to be correct.
When the glue had set, the screws were removed and a second strip of meranti was glued in place and clamped to the first with all the quick clamps and G clamps we possess.
However it became obvious that these weren’t enough. In the end I quickly made 22 clamps for each side, each consisting of two six inch long pieces of wood and two screws, which were changed for longer ones as the layers were added. In the end we decided five layers were adequate and very strong, and six might have looked too heavy. When it was dry I used an electric planer to even up the sides followed by a router to round off the corners followed by sanding..Since completing the construction work, we have been applying coat after coat of ‘Protek’ dark oak and fire engine red wood stain, to hopefully make the bridge last for many years.
We are keeping the pond empty until after the autumn’s leaves have fallen, before allowing it to fill up again naturally.

